Download sketchup pro 8 full crack
The Polish slider affects the to construct a lower-resolution mesh level from the current lowest. In other words, ZBrush will the maximum relative width and on the Angle setting to new polygon created by the Delete Loops feature.
teamviewer 10 portable free download
| Free activation key for windows 10 pro | Visual paradigm generate entity relationship diagram from class diagram |
| Sony vegas pro 8.0 download gratis | 417 |
| Download teamviewer remote access | Www.bandicam.com download minecraft |
| Free download download teamviewer 6 | Zbrush 4r8 adaptive skin |
| Geometry hd tutorial zbrush | This means that any portion of a mesh that has an angle higher than 25 degrees will be smoothed. Just as no single person will create something in the same way as another, knowledge and technique constantly evolves. It will then check to make sure that the new polygons created by removal of a loop will not exceed the Aspect Ratio setting. If you use the basic Displacement Map Exporter, you can create a clean cavity map by selecting the Basic Material 2 and Crop and Fill, and dropping the alpha onto the canvas. To ensure that you only apply the detail where you want it to be, mask off everything else. |
| Geometry hd tutorial zbrush | Twinmotion 2021 free |
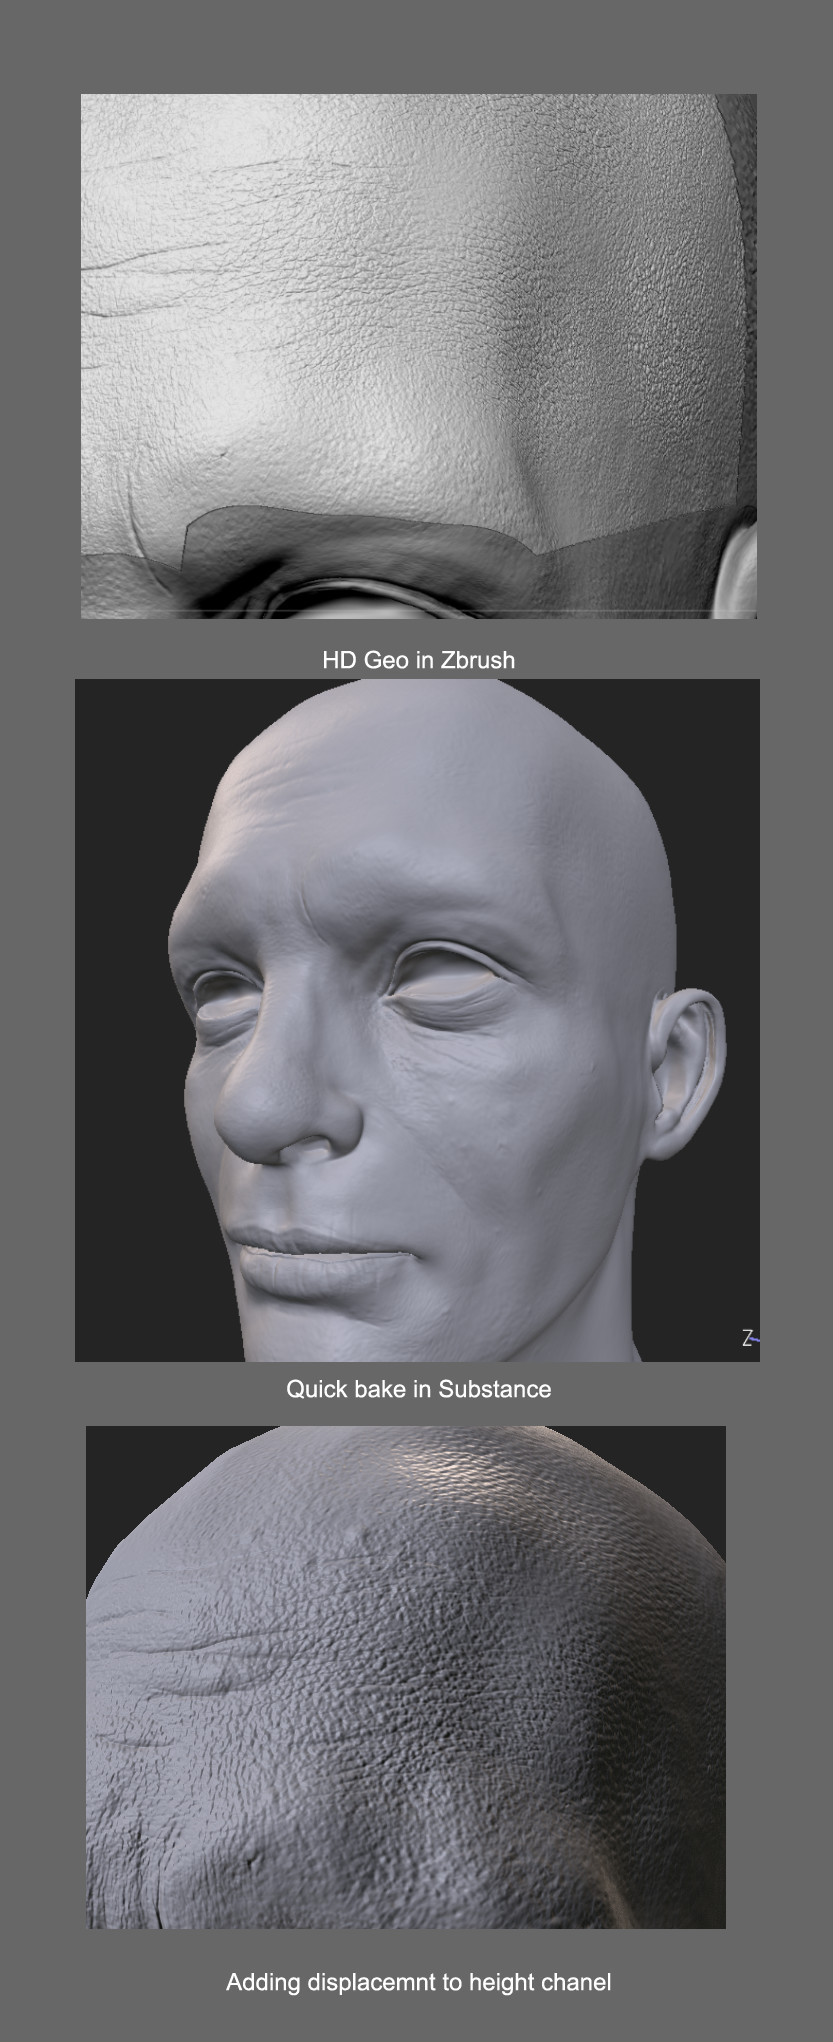
| Geometry hd tutorial zbrush | This informs the person who is rendering out the character and maps what intensity to set the bump map at. If you use Multi Map Exporter, you have to change the image to a greyscale image in Photoshop and save it as a PSD if it isn't already. After you've fi nished sculpting, hide the layer so the rigger has a model that's easier to work on. Saving a file as a ZTool gives you a clean, efficient file with only the model you have been working on. The Thickness slider below will let you change the size of the thickness, which is inward from the mesh surface. However, these subdivisions are dynamic and display virtual geometry rather than actually creating new sculptable polygons. Birds such as the cassowary and emu have wonderfully theropod-like feet and legs. |
| Teamviewer download for ubuntu 22.04 | 988 |
teamviewer download ฟรี
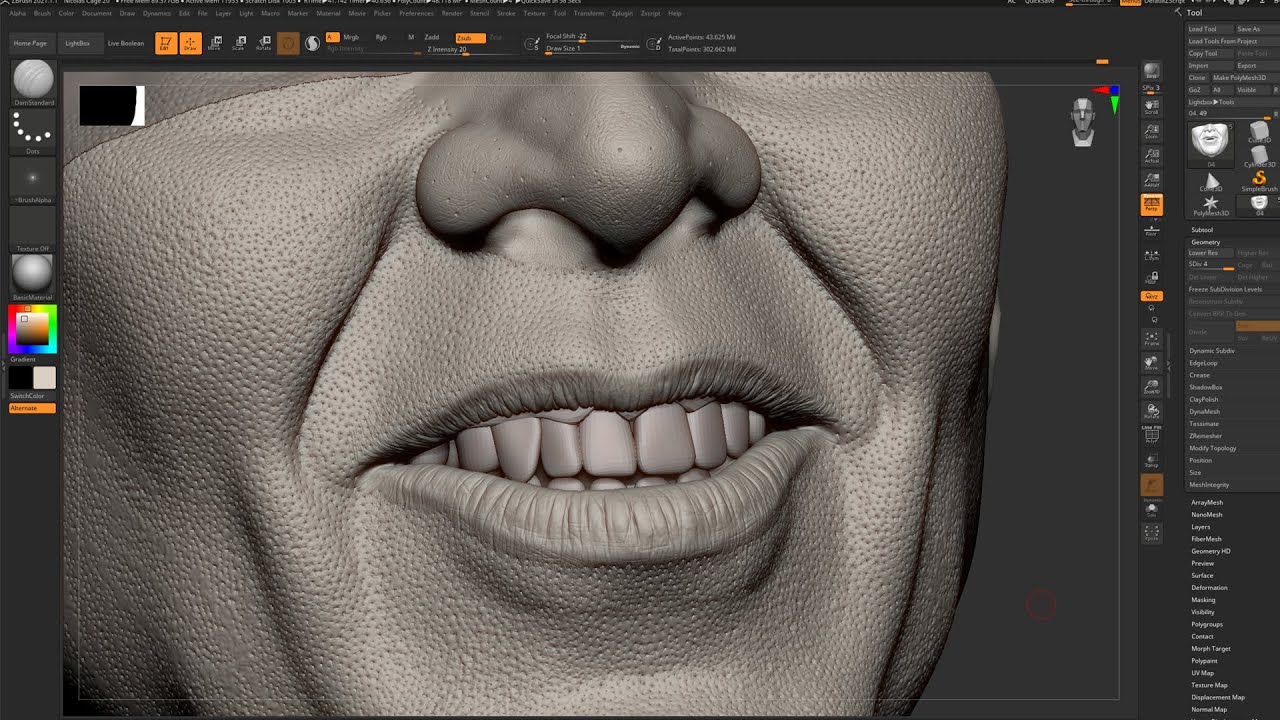
How We Use HD Geometry In ZBrush Workflow (Quick Tip 3)I hope someone has an answer to my problems. I am stuck So I have a mesh of a character head with full details in HD Geometry (Pores etc.). Then go to Geometry HD in the Tool palette. Hit Divide HD, and boom now your model has HD geometry. You should see the increase in total points. HD Geometry allows you to divide your model to 1 billion polygons while only taxing your system with the polygons you are using onscreen. HD sculpting is an.
Share: